DIY Cardboard Box Patterns
Do you need a box? A box that is a specific size? Do you have cardboard but no box but need a box? Well, guess what: We can show you how to make a DIY box in whatever size you need with whatever pieces of cardboard you have laying around.
We have several box patterns for you – a clamshell box and a box with a removable lid. I have devised formulas that will tell you the size of the flat rectangle you’ll need to make a box of the size of your choosing.
Here are the formulas:
A = width
B = length
C = depth
Choose the size of the box you’d like and assign the appropriate letter to that value.
For a clamshell-style box, cut out a piece of cardboard that is this size:
Width = (A*2) + (C*3)
Length = B + (C*4)
For a box with a removable lid, cut out 2 pieces of cardboard that are this size:
Width = A + (C*2)
Length = B + (C*4)
Next, we’ll see how to assemble the whole box.
How to make a clamshell box
Materials & Tools
- Cardboard
- Scissors
- Exacto Knife
- Ruler
- Pen
- Craft Glue
Choose your box size and calculate
Choose the width, length, and depth of your box. Assign the appropriate value to each letter.
I’m making a 5in x 5in x 1.5in box, so I will assign A = 5, B = 5, C = 1.5.
A = width
B = length
C = depth
Calculate the size of the cardboard you’ll need using:
Width = (A*2) + (C*3)
Length = B + (C*4)
For my 5in x 5in box, this comes out to 12.5in x 10in.
Cut out a cardboard rectangle with your calculated width and length.
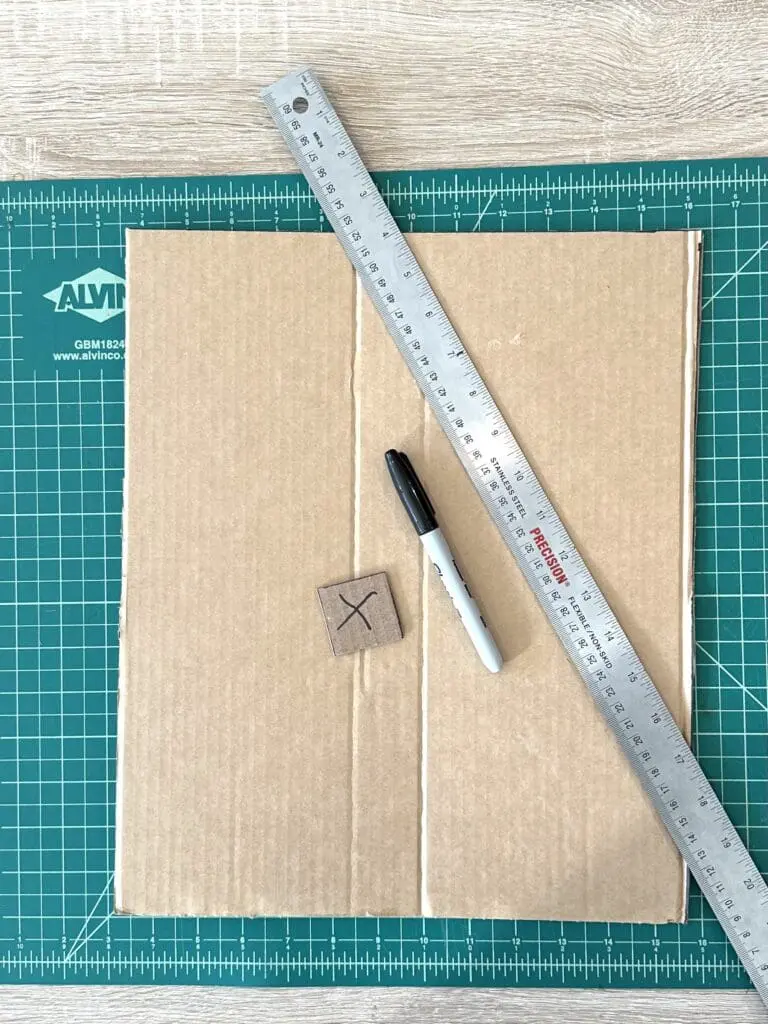
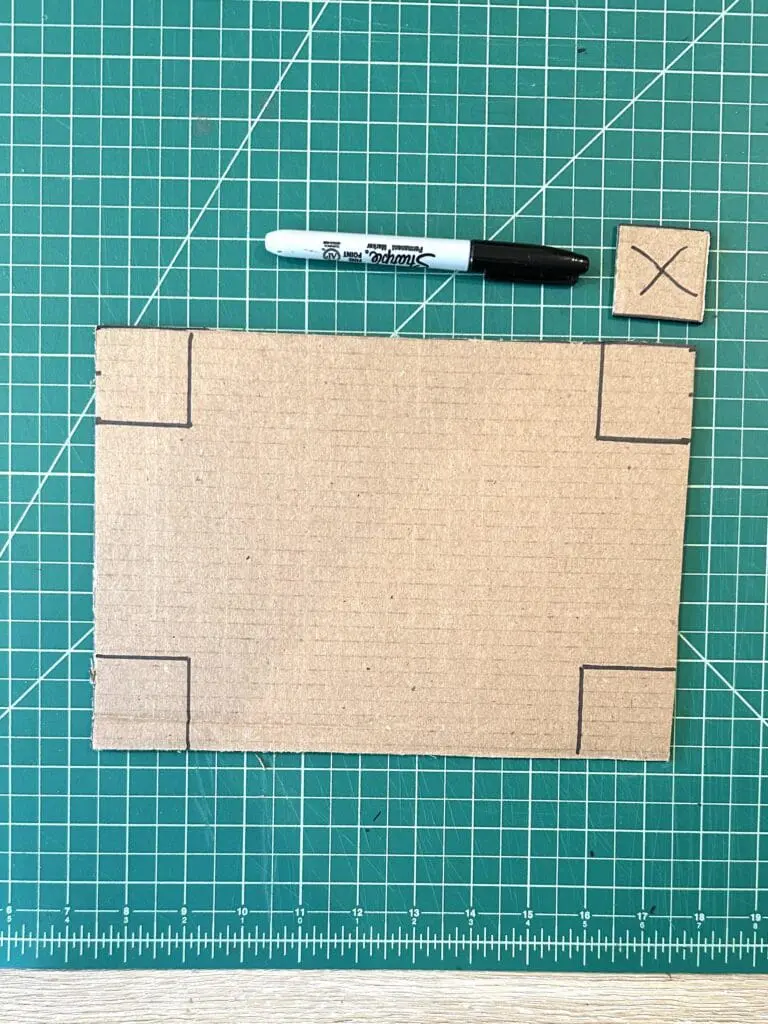
Optional: Cut out a square of cardboard that C x C. This is very useful later on for marking cutting and folding lines for this DIY box.
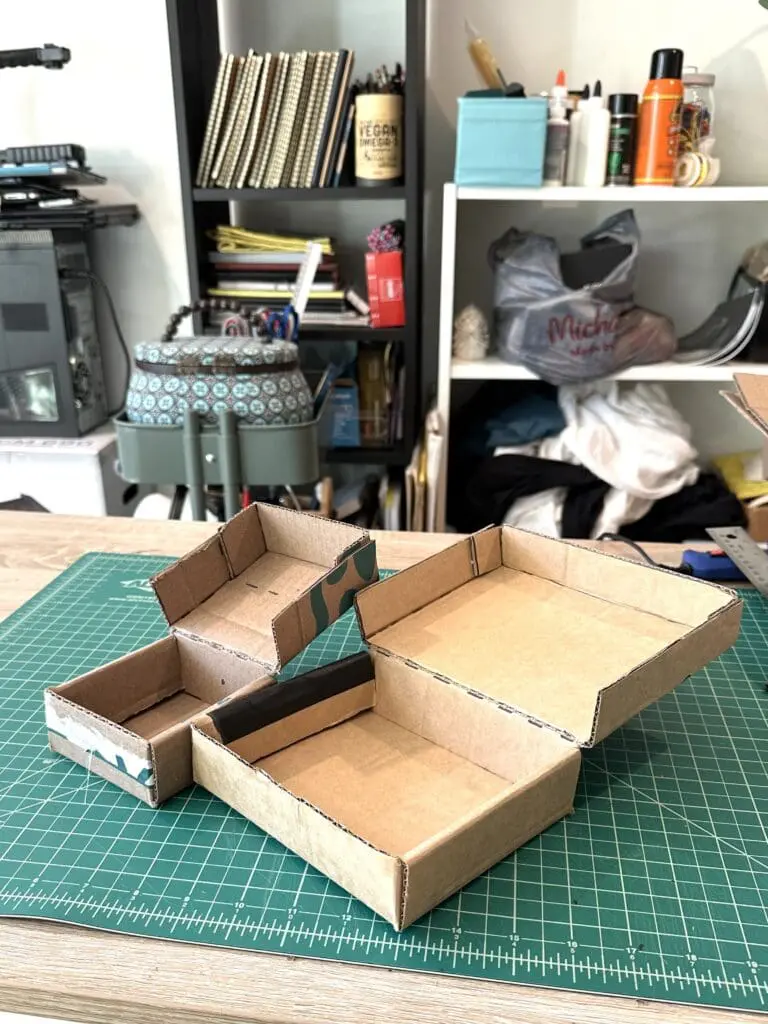
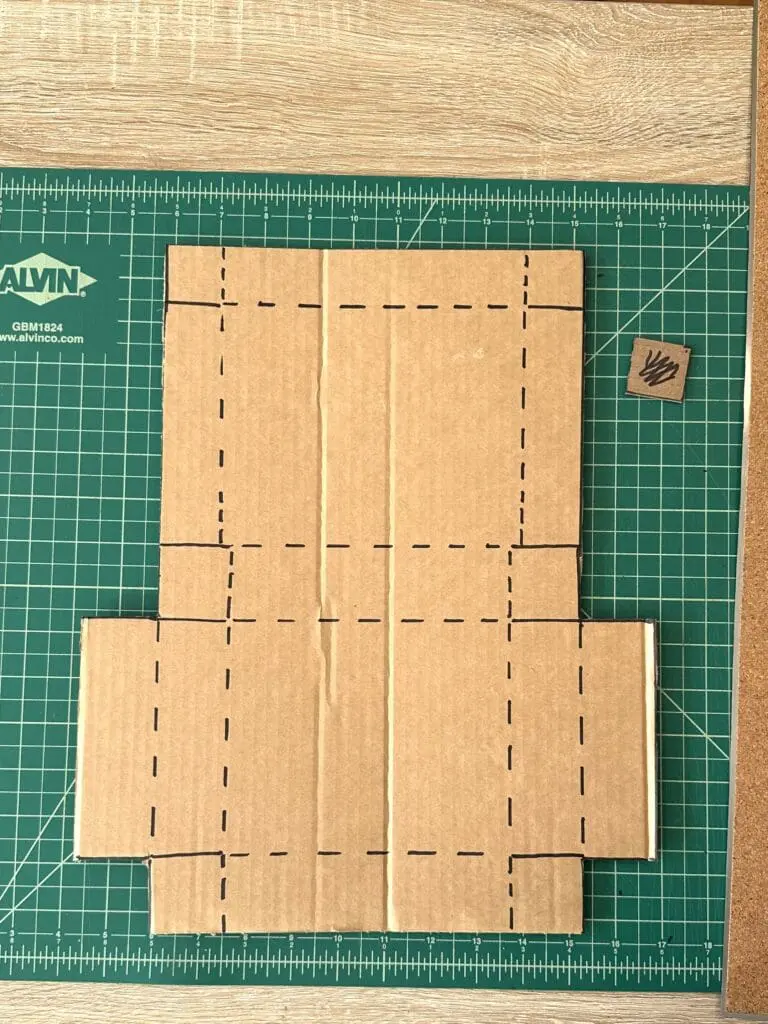
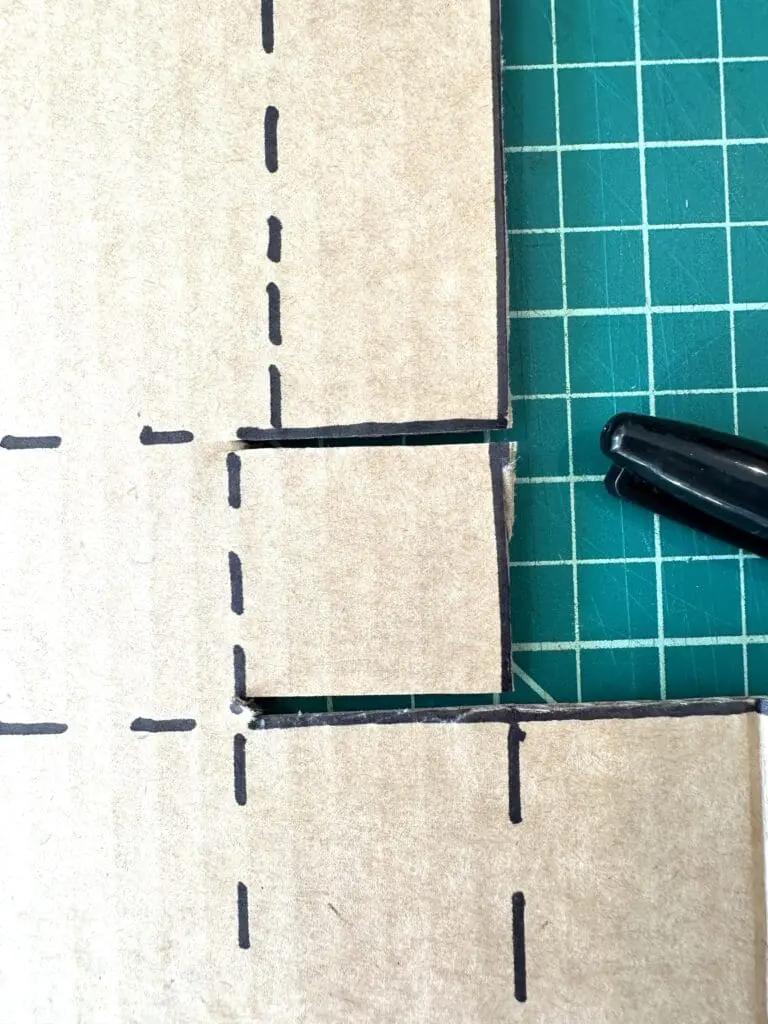
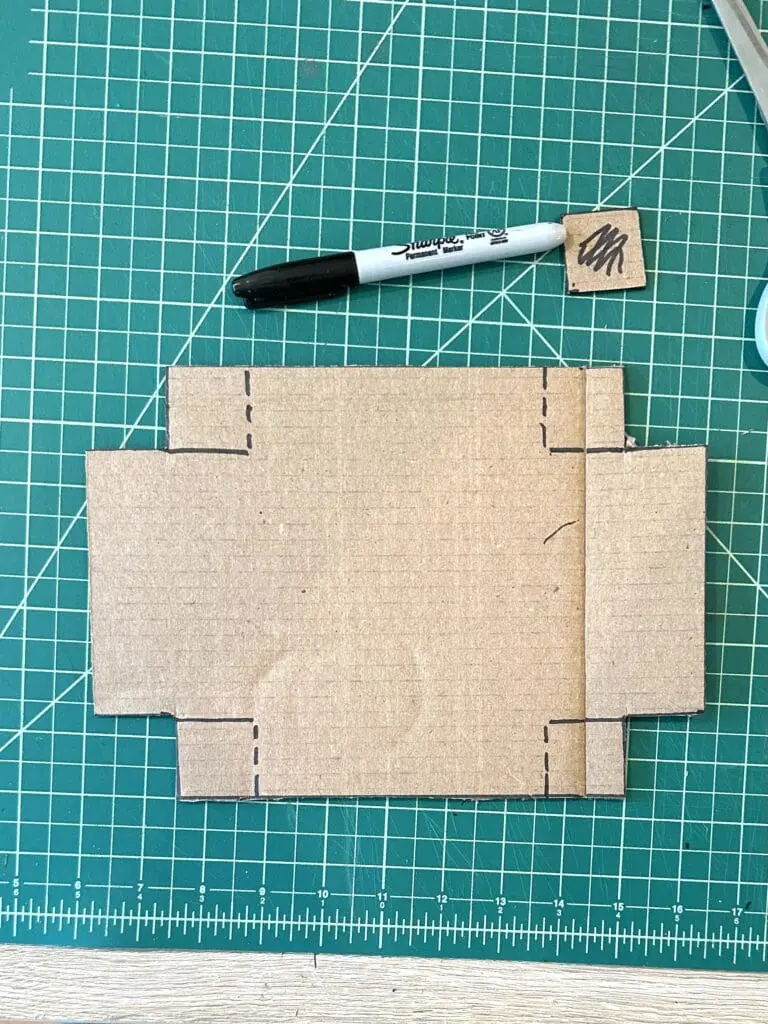
Mark and cut out the corners
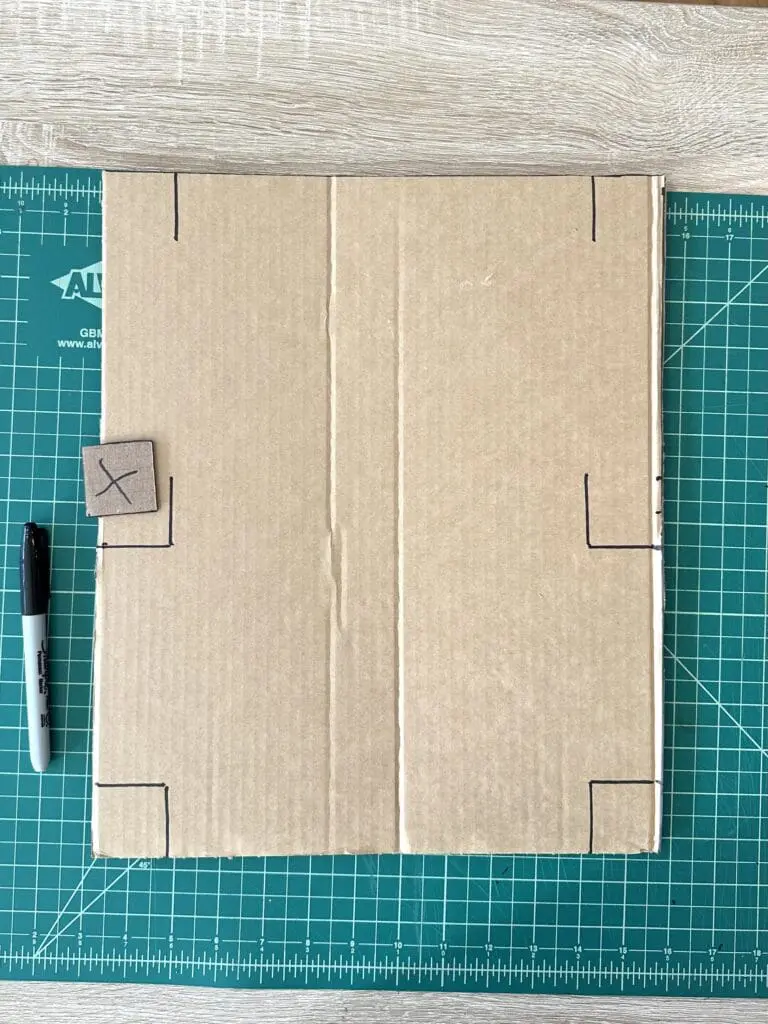
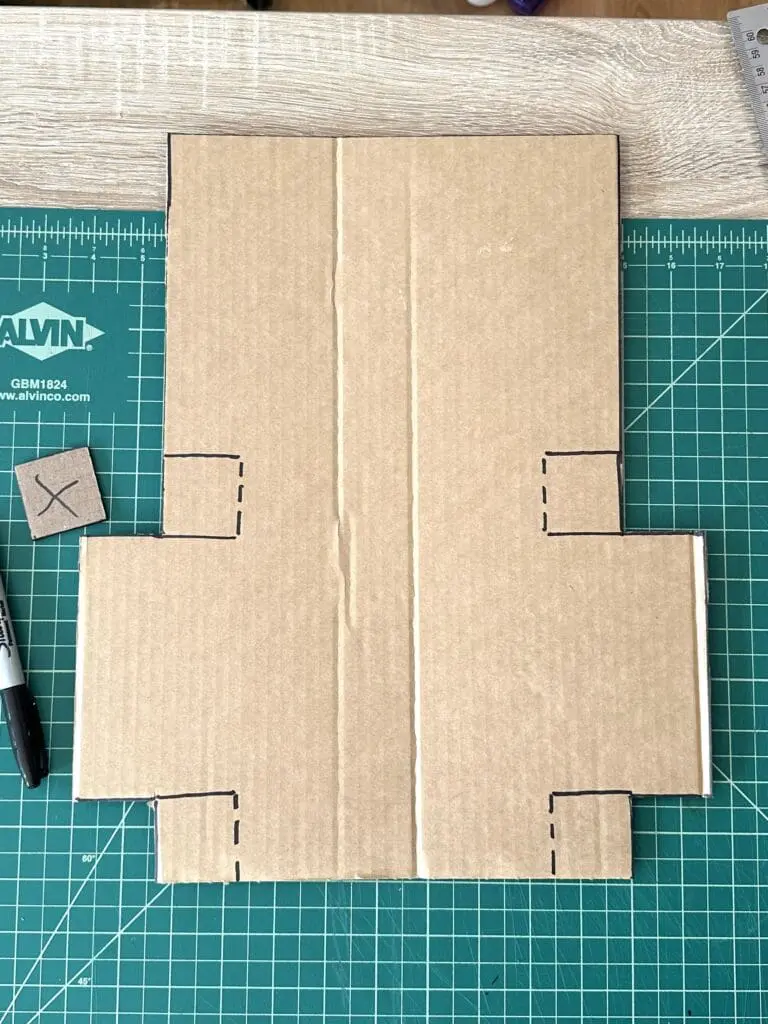
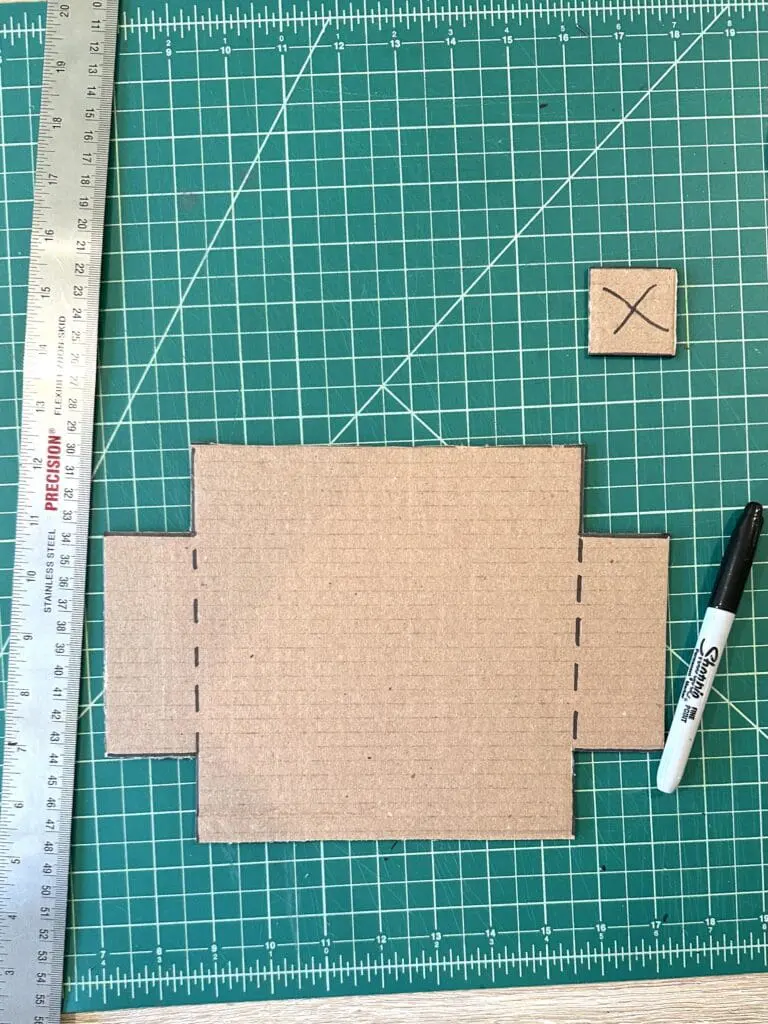
Trace a C x C square onto the bottom corners of the cardboard rectangle, two sides of a C x C square onto the exact middle of the edge of the long side of the cardboard, and one side of the square in the top corners. See the first photo for what your marks should look like.
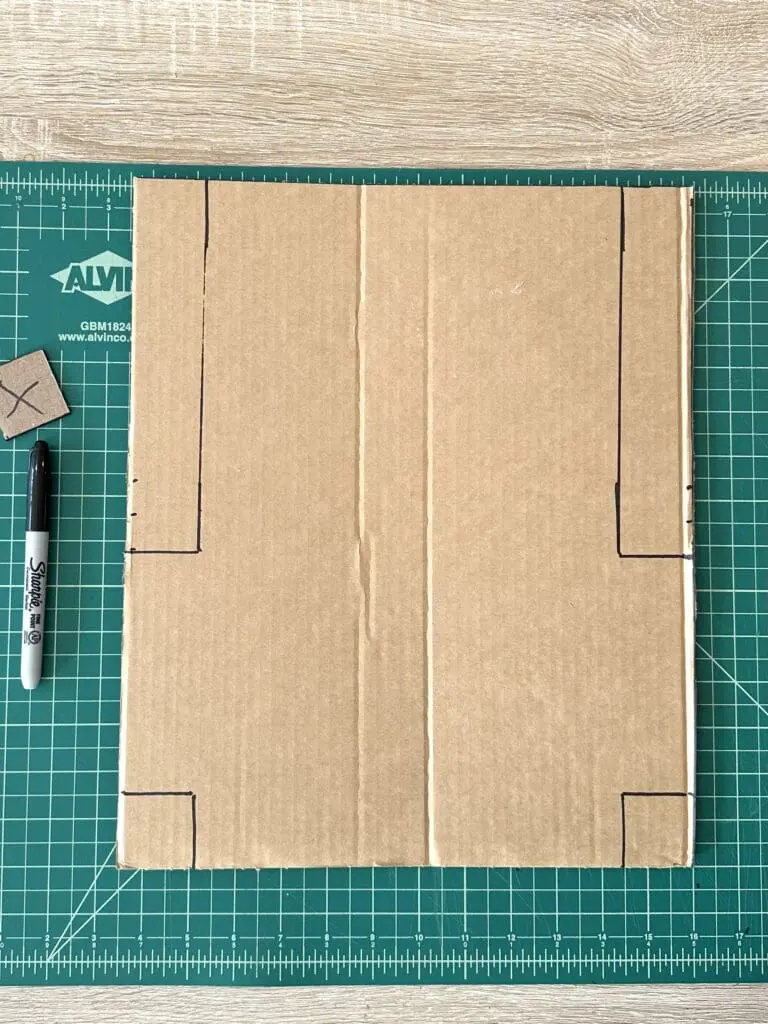
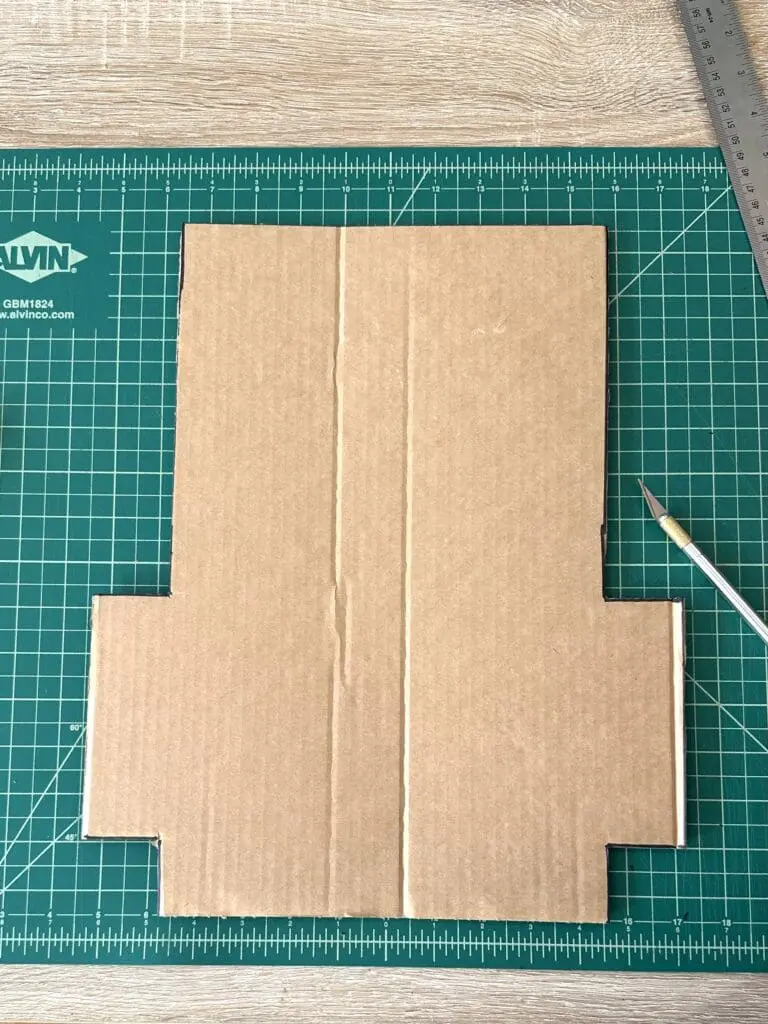
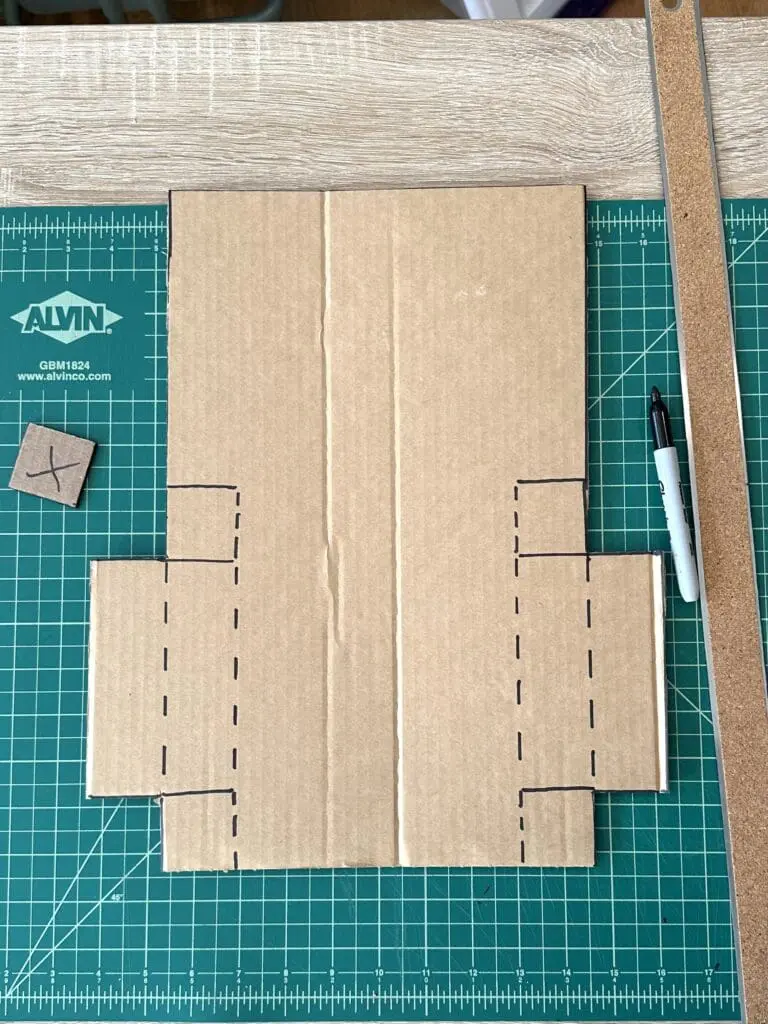
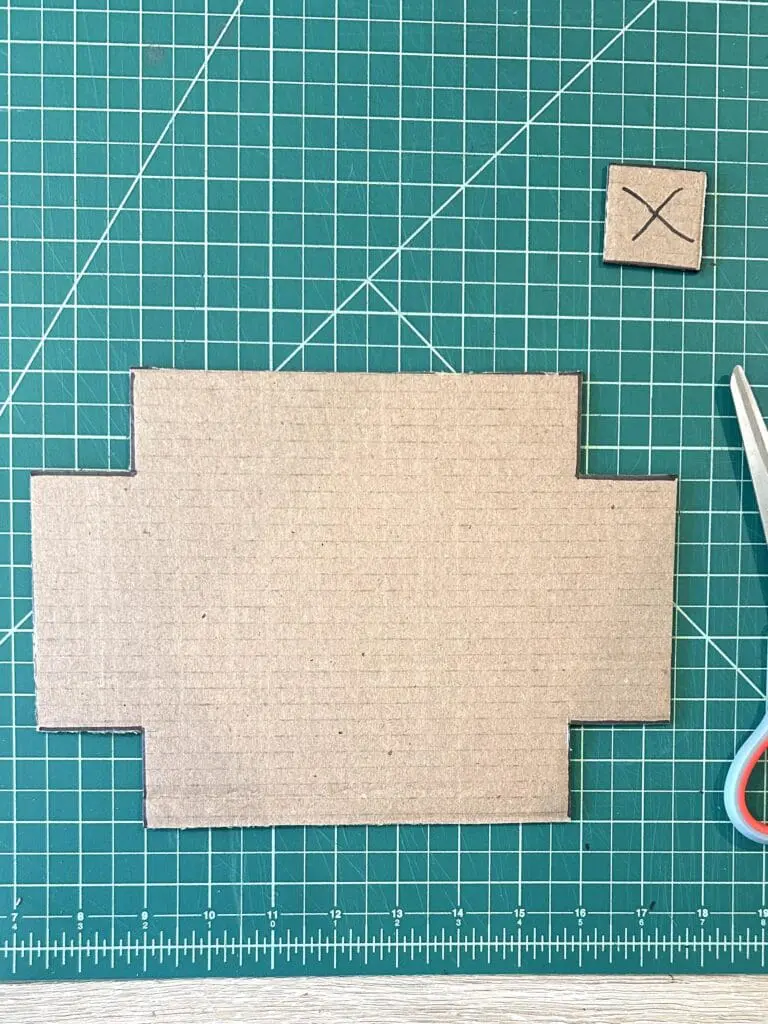
Connect the squares from the middle and top corners (photo 2). Cut out areas that you just traced (photo 3)
Mark scoring lines for the bottom of the box
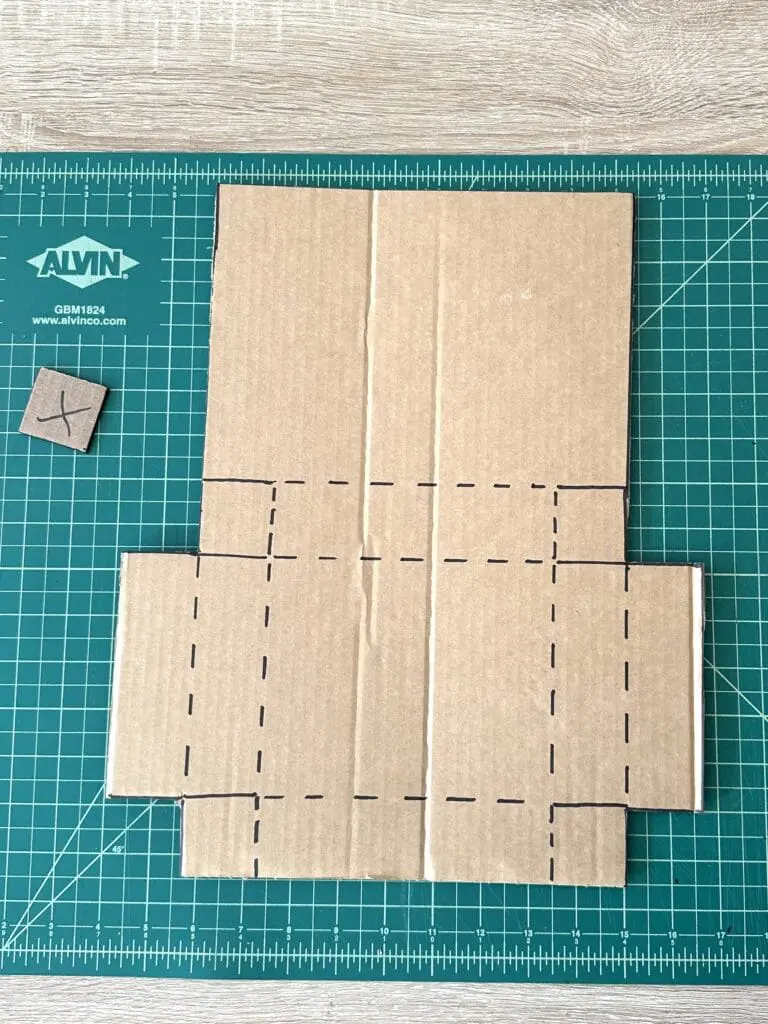
Mark the lines where the bottom of the box will be cut and scored for folds. Use solid lines to cut and dashed lines to score, using the pattern in the last picture.
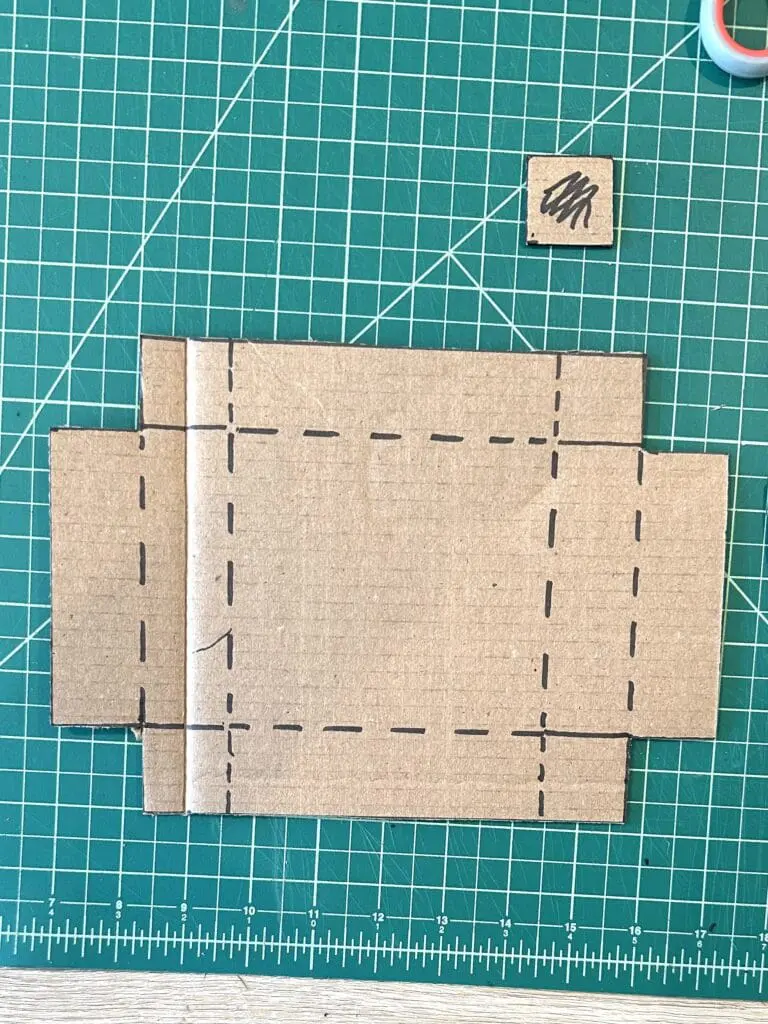
Mark scoring lines for the top of the box
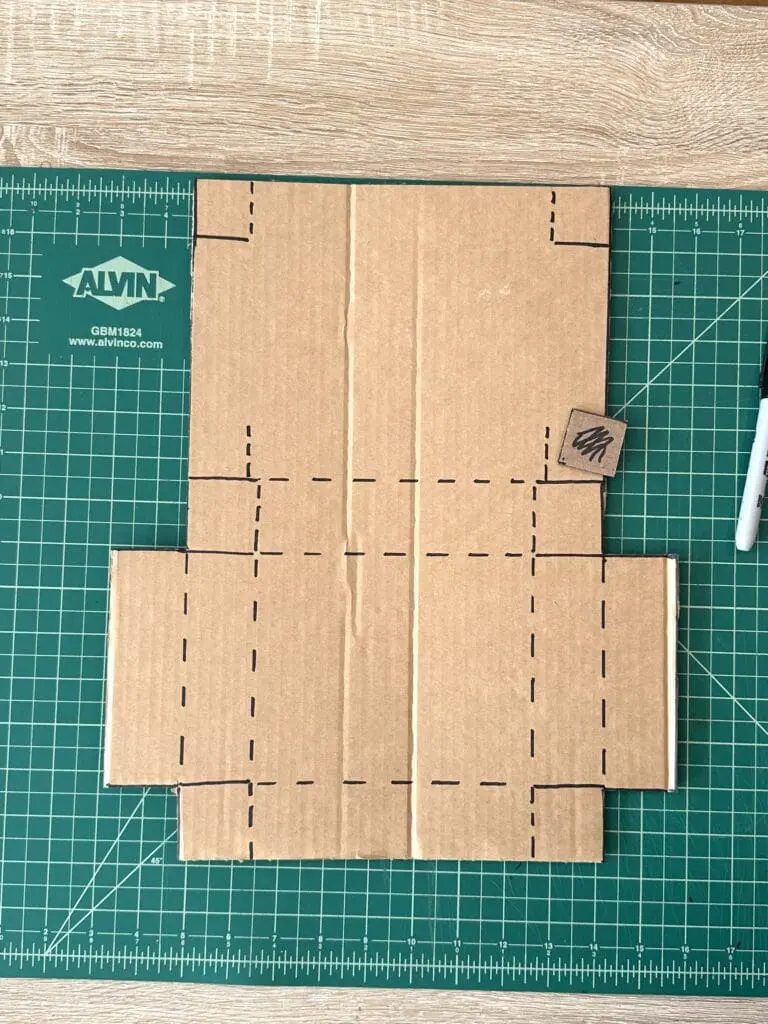
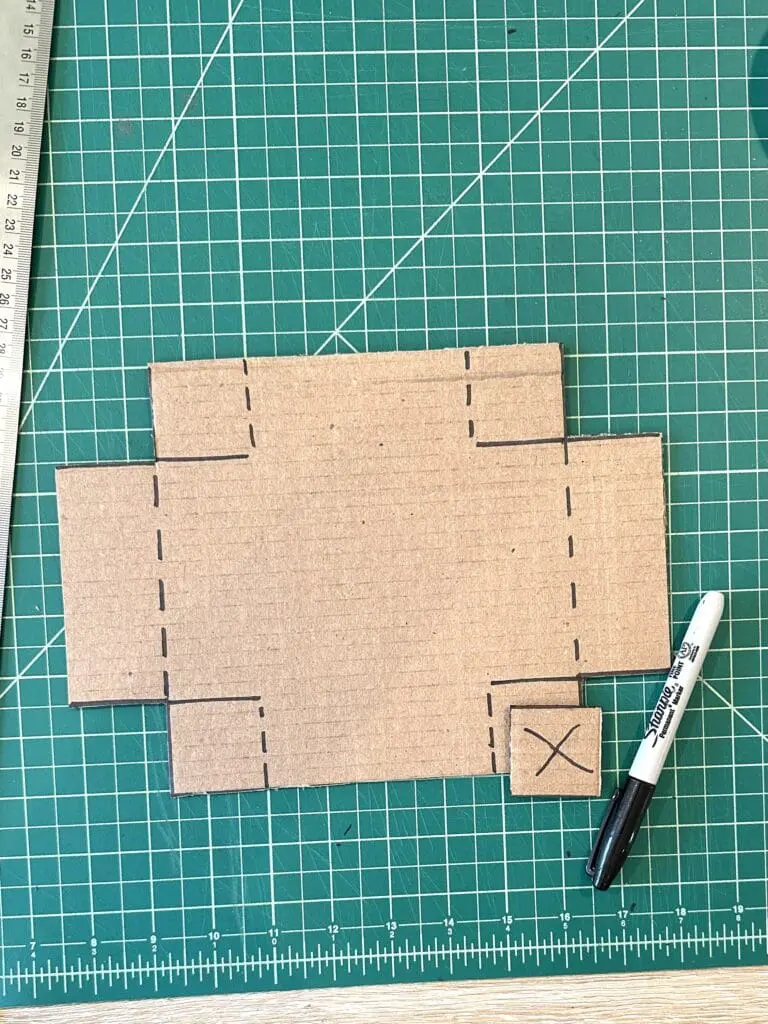
Mark squares in the top corners of the cardboard that have the dimensions of (C – 1/4). You can cut out a small piece of cardboard this size to trace around. These measurements will make the top of the box a little wider than the bottom, allowing the lid to close. Mark cut (solid) and score (dashed) lines as shown in the photos.
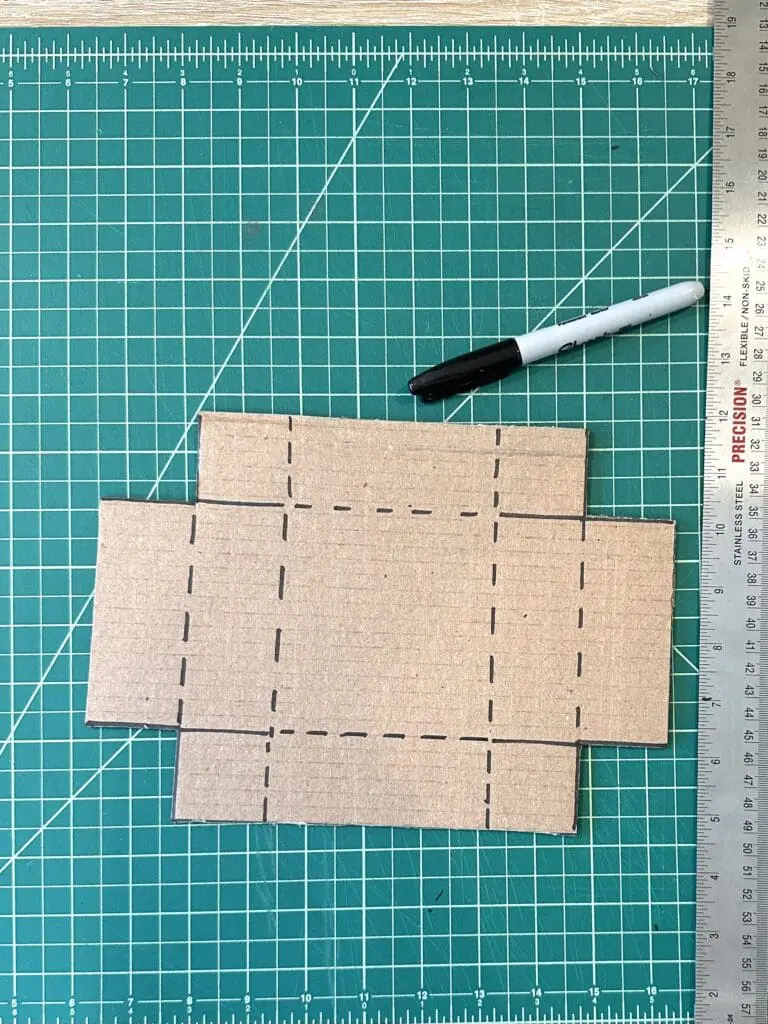
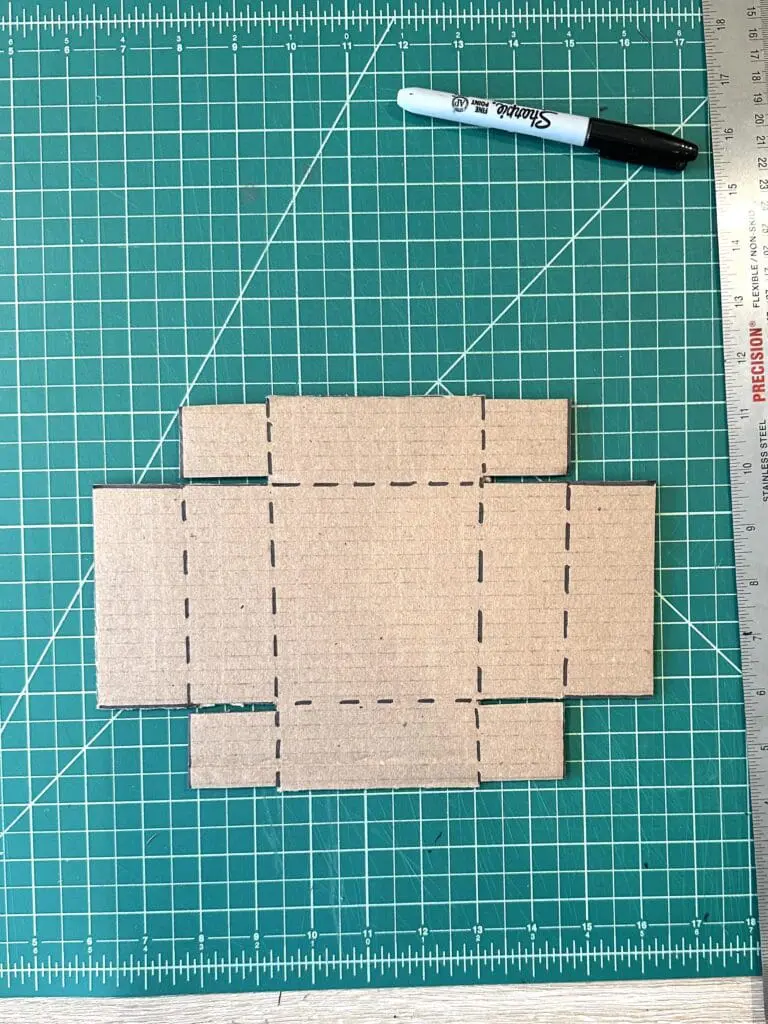
Score and cut the box
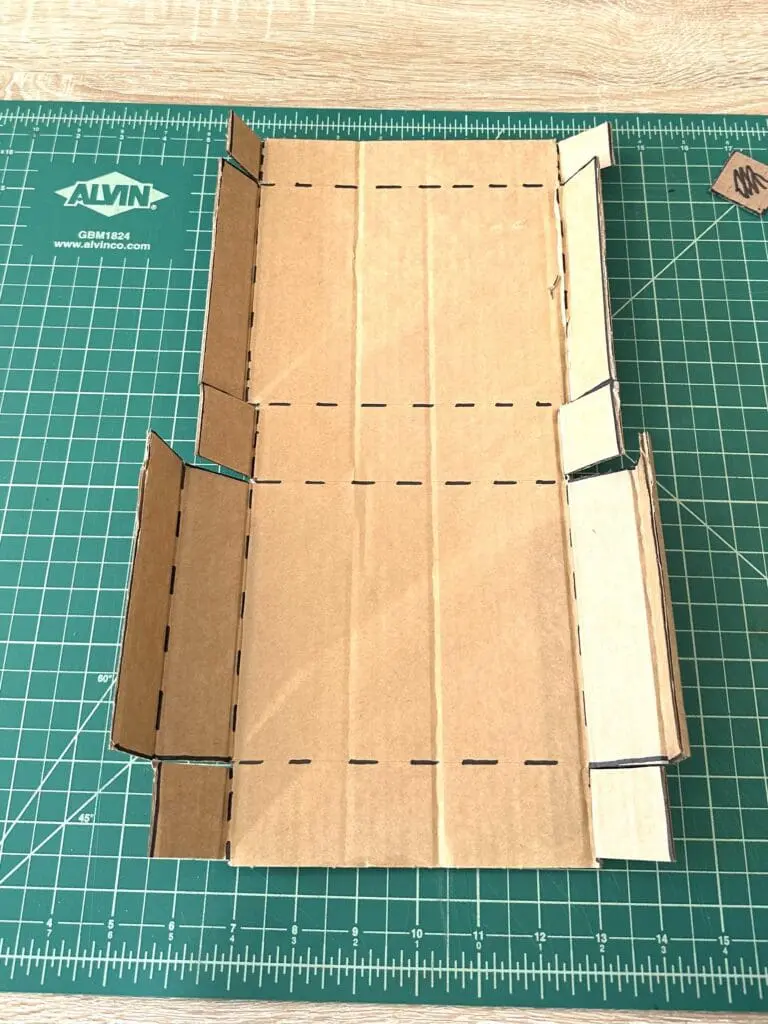
Score along the dotted lines and cut along the solid lines
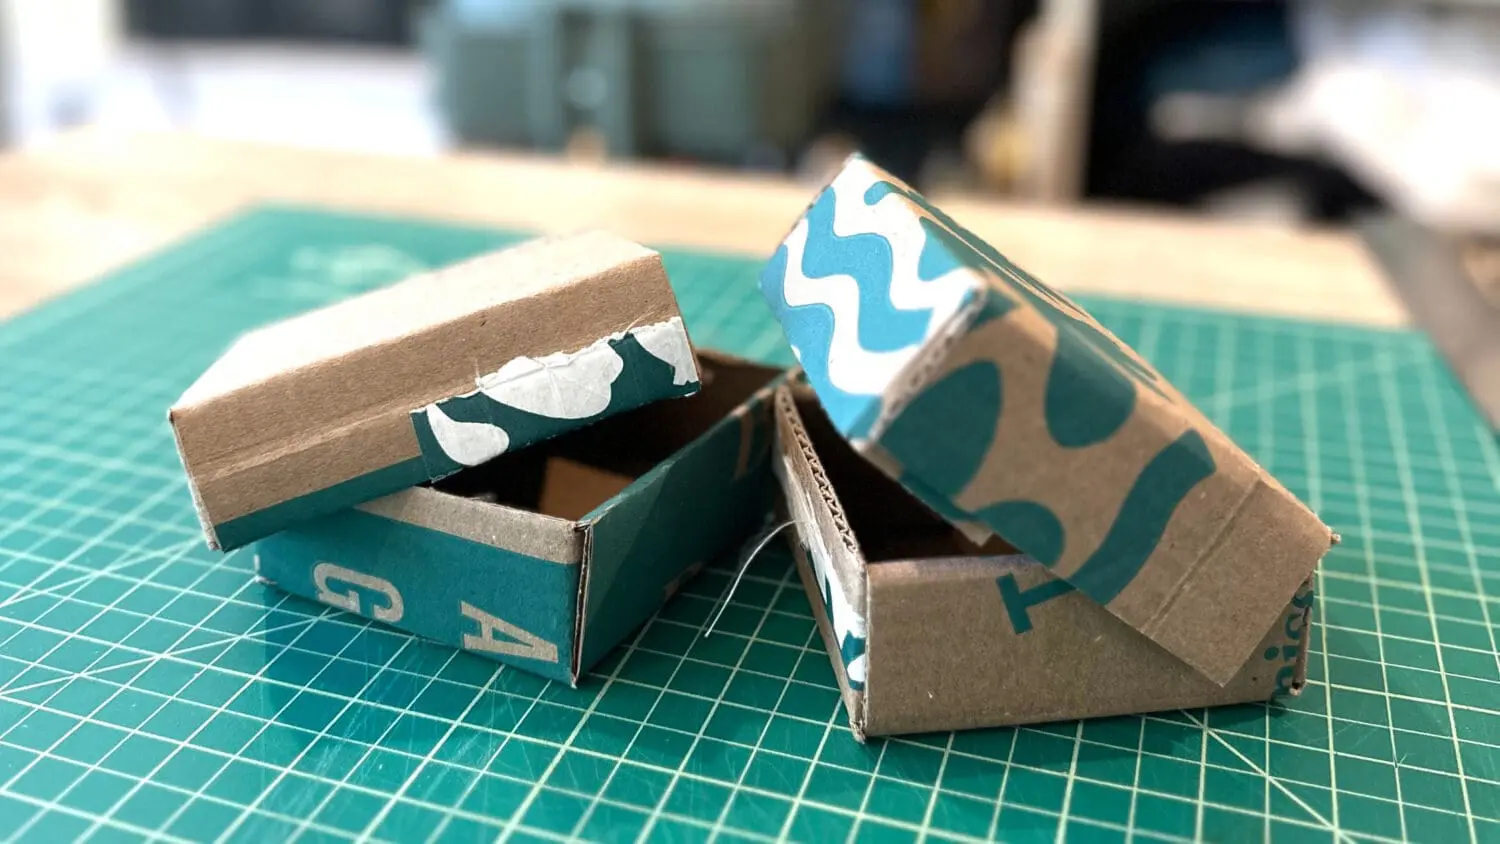
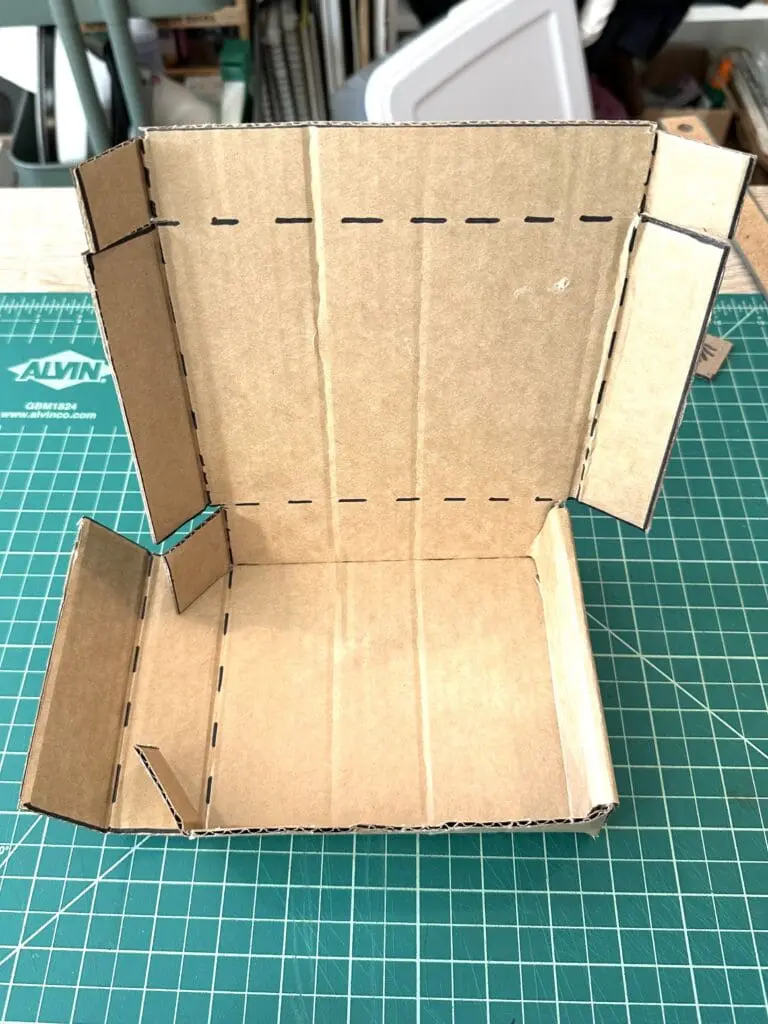
You can now fold up the bottom of the box and make sure everything is working as expected.
Trim and adjust
If it’s difficult to fold, cut out a little on the sides of the flaps to make extra room for the folds.
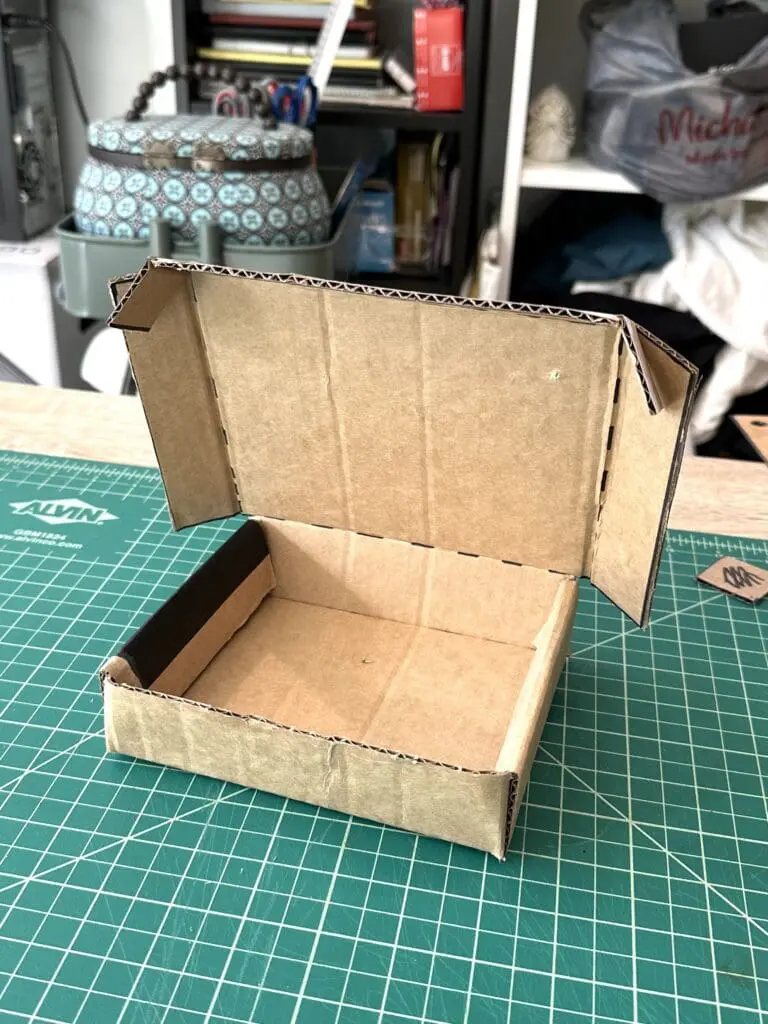
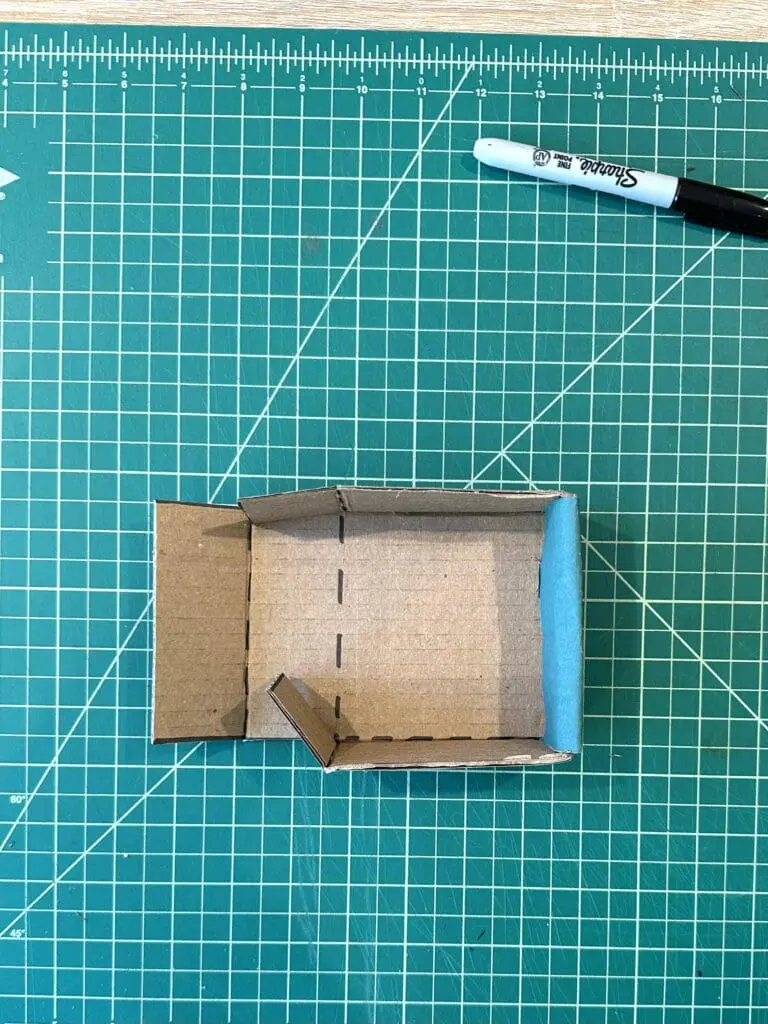
Fold the box and secure
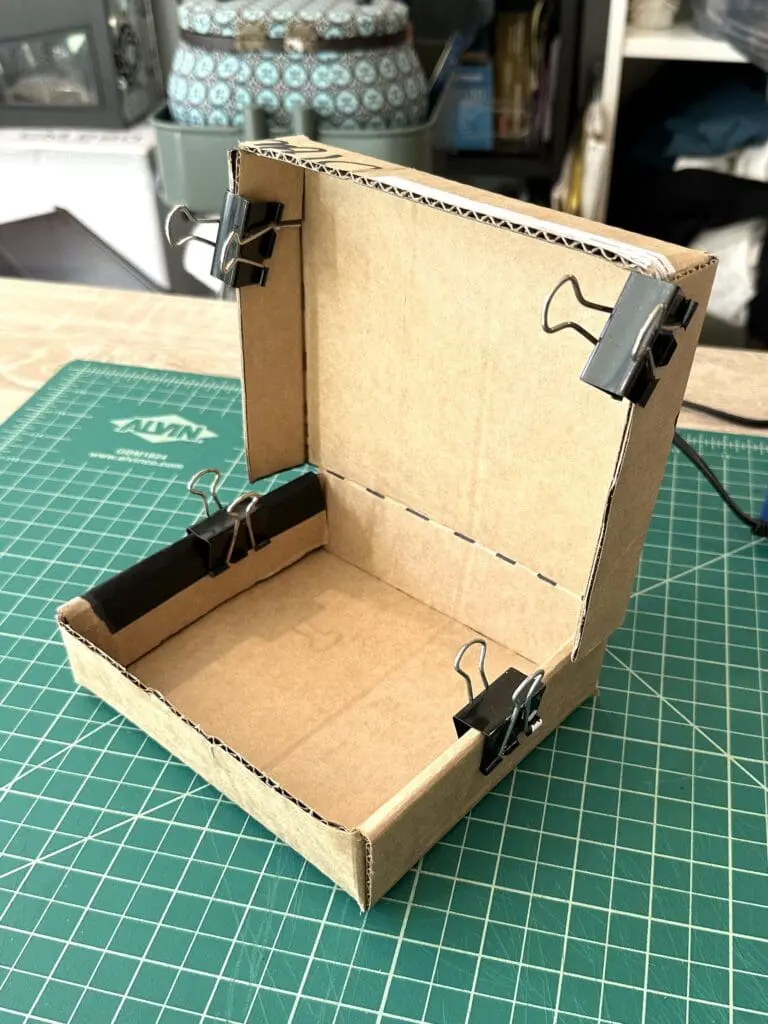
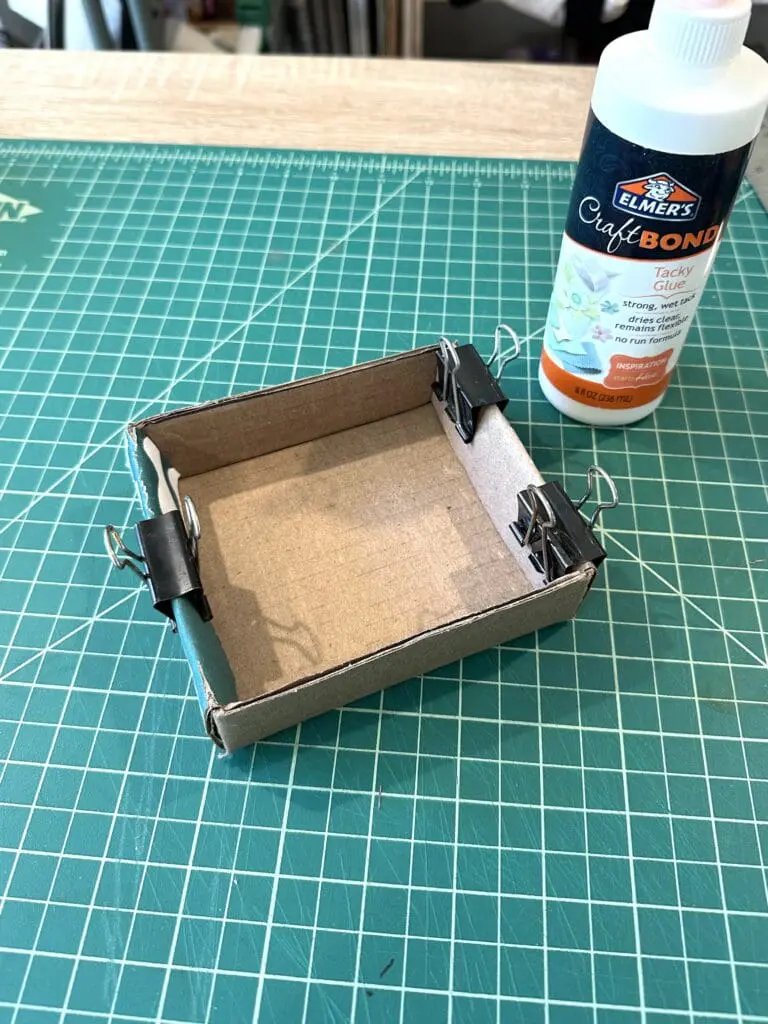
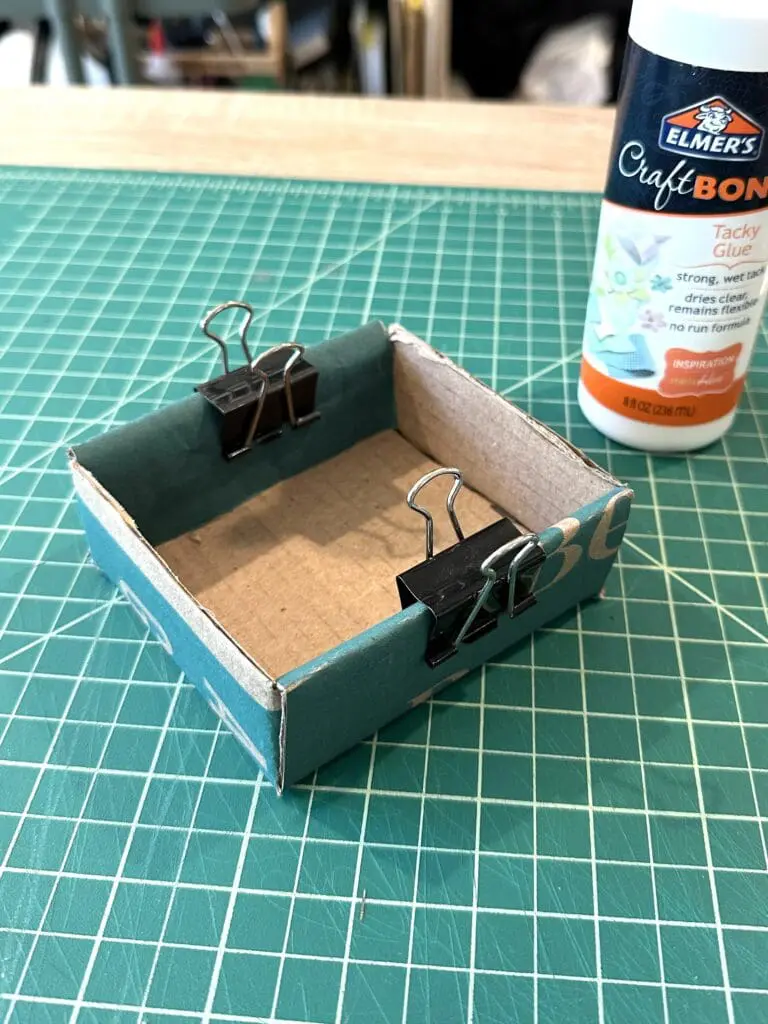
Glue (or staple) the small flaps on the front and back sides to the inside of the left and right sides, to keep the box together. For easier folding, fold with the scoring on the outside. Get a smoother look by folding with the scoring to the inside of the folds.
I found that hot glue does not work very well to keep the box together, so I used craft glue and held the box together with binder clips while the glue dried.
Tip: If the lid of your box doesn’t stay closed, try scoring the other side of the fold on the back of the box as well. Pinch the fold together to open up the new scored line and help the lid stay shut.
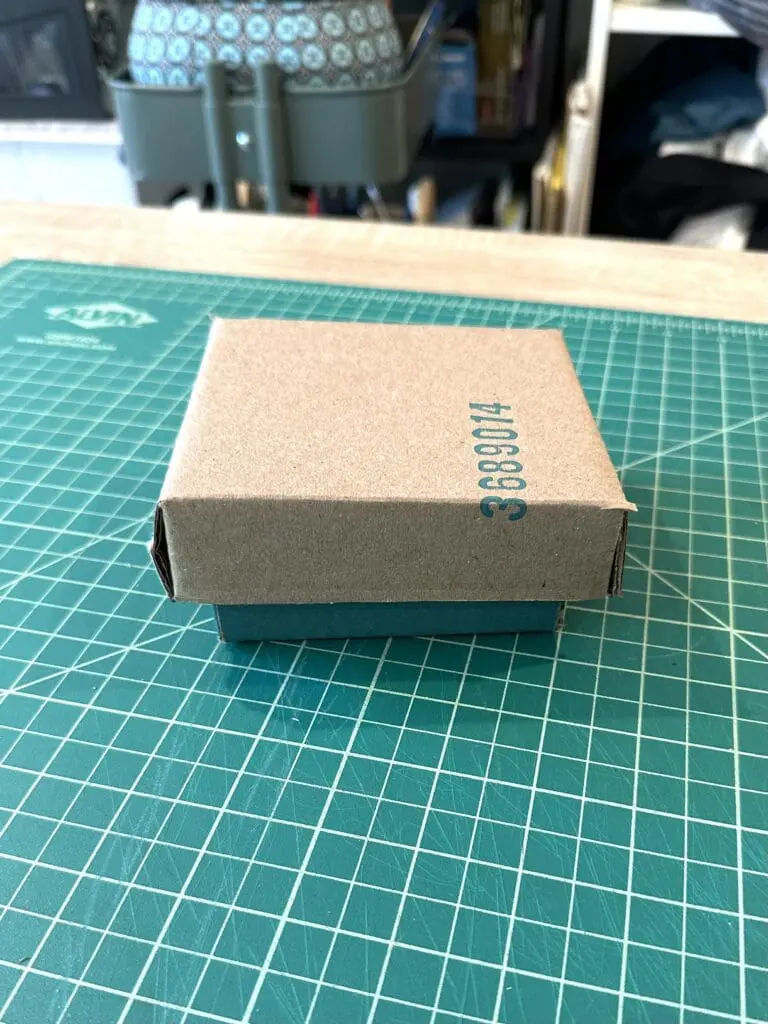
Use your new box
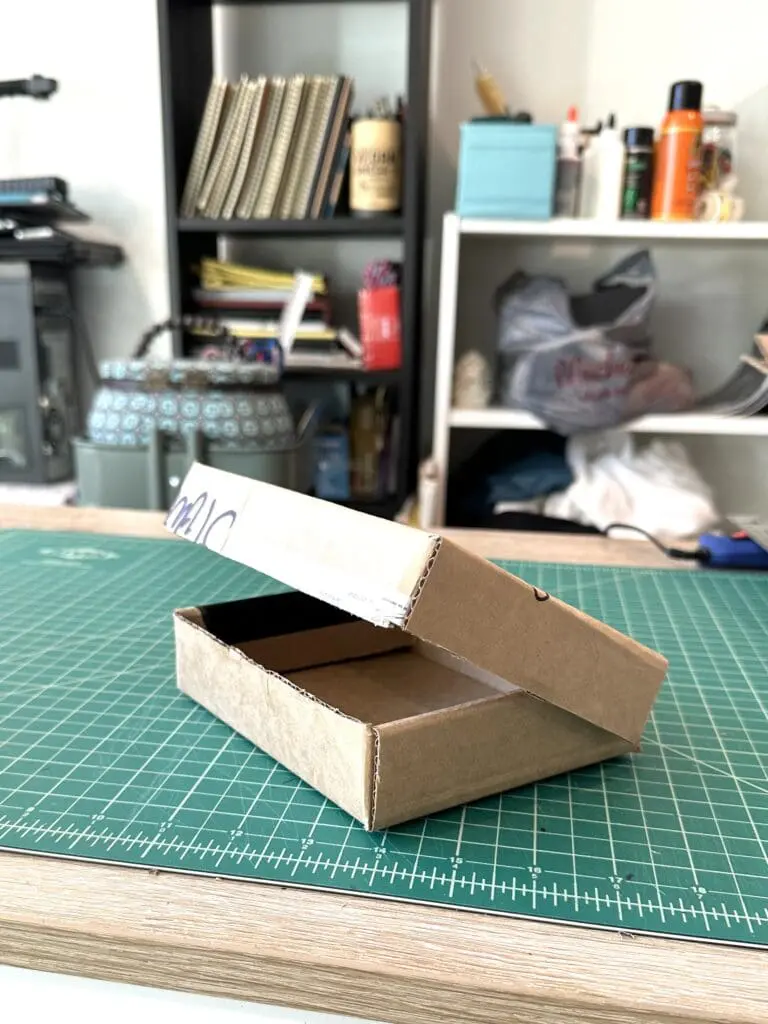
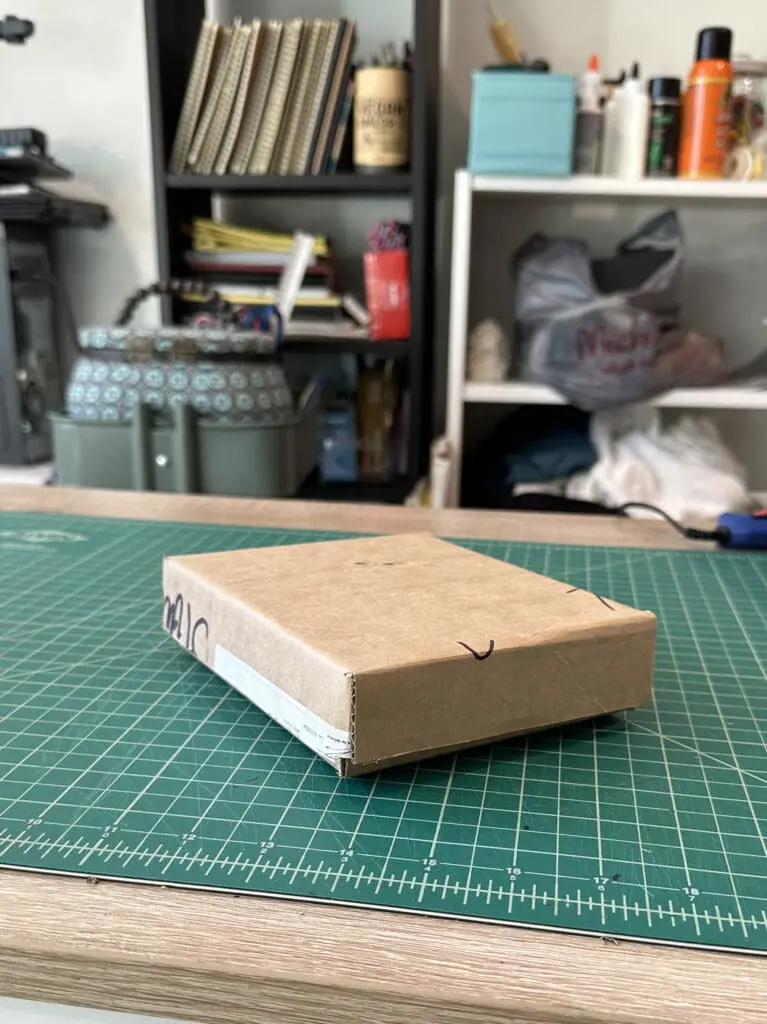

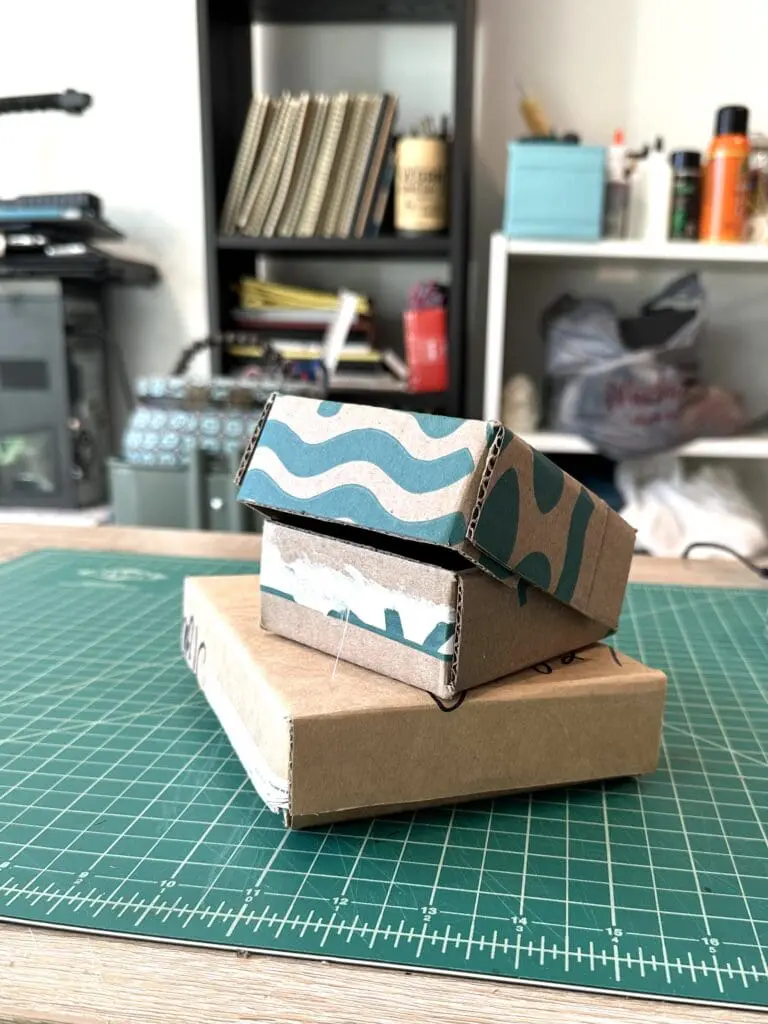
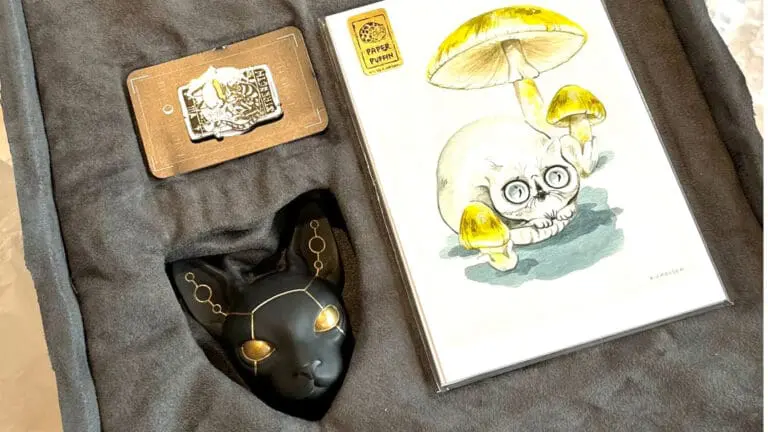
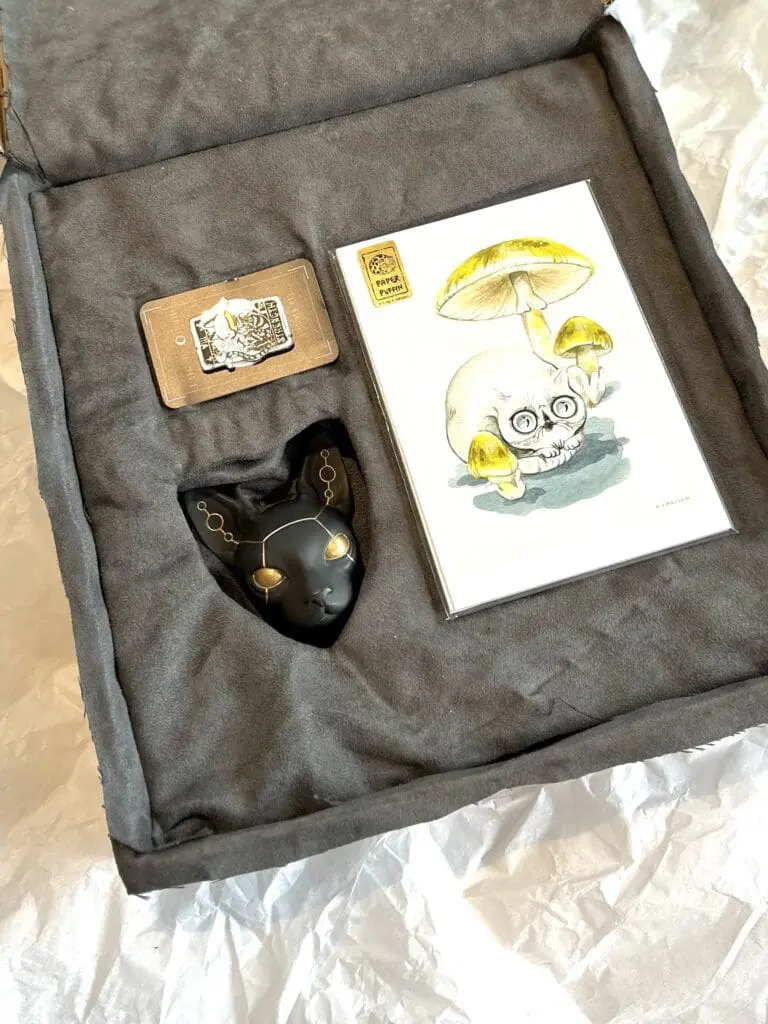
Now you have a great new box for whatever you needed a box for! Maybe a gift?
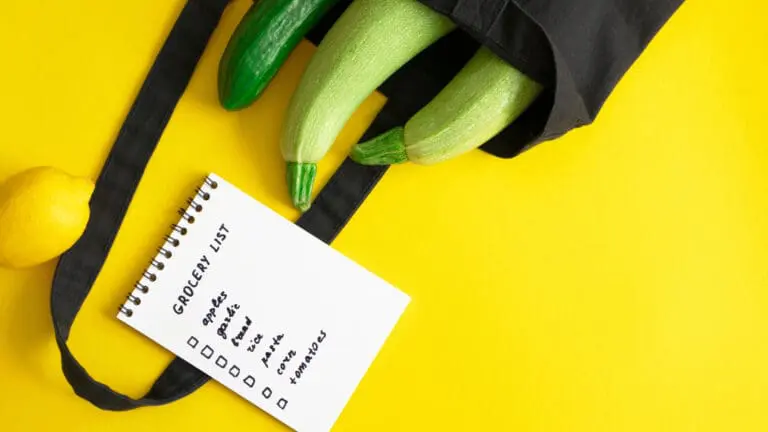
DIY an Elegant Gift Box
Elevate and enhance your giving with a custom gift box
How to make a box with a removable lid

Materials & Tools
- Cardboard
- Scissors
- Exacto Knife
- Ruler
- Pen
- Craft Glue
Choose your box size and calculate
Choose the width, length, and depth of your box. Assign the appropriate value to each letter.
A = width
B = length
C = depth
Calculate the size of the cardboard you’ll need using:
Width = A + (C*2)
Length = B + (C*4)
Cut out 2 cardboard rectangles with this width and length.
Optional: Cut out a square of cardboard that C x C. This is very useful later on for marking your cutting and folding lines.
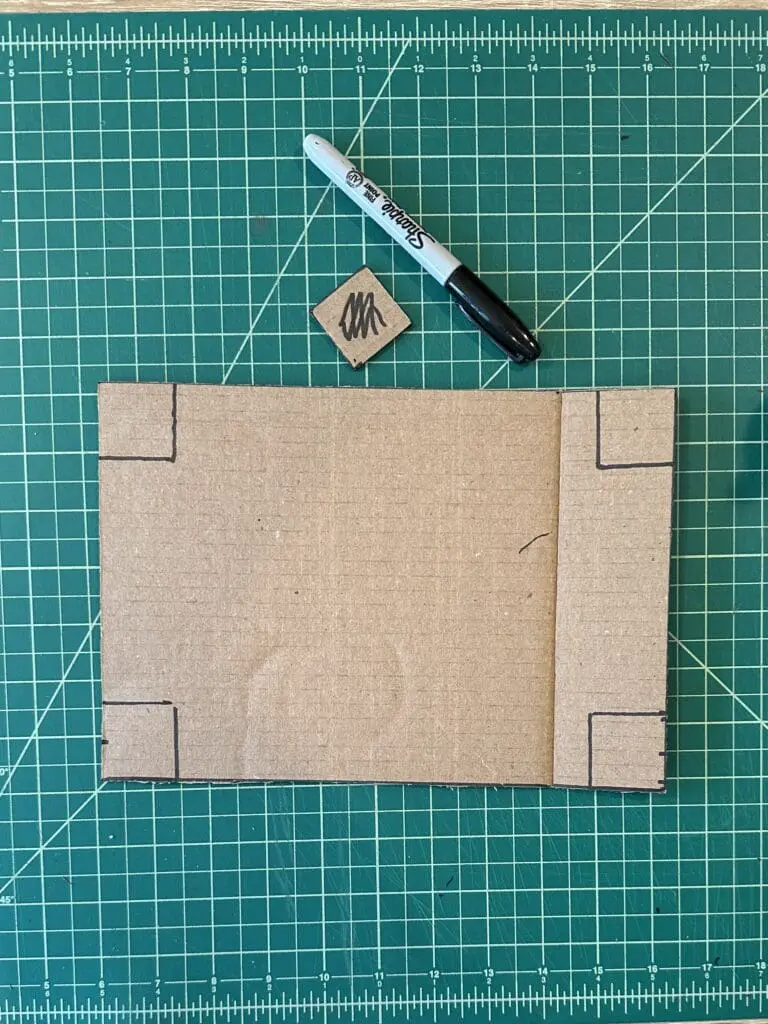
Cut out the corners on the bottom
Trace a C x C square onto each corner of the cardboard rectangle.
Cut out the corner squares that you just marked.
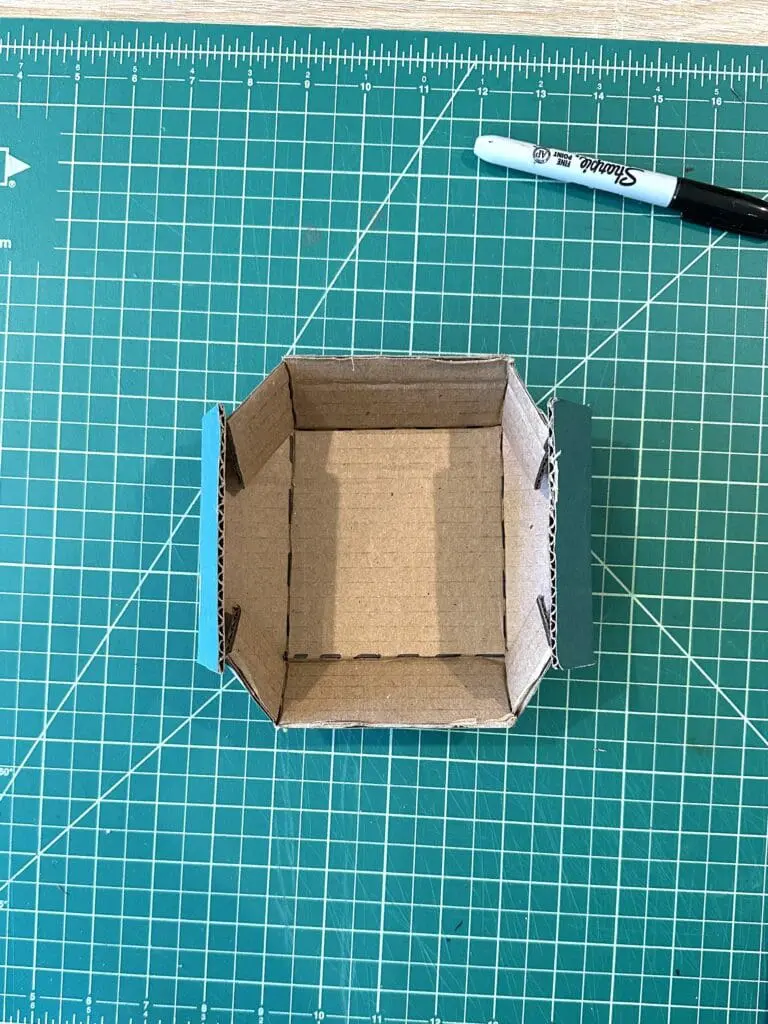
Score and cut the bottom of the box
Mark lines as shown in the photos, and cut solid lines and score along dotted lines.
You can now fold up the bottom of the box and make sure everything is working as expected.
Score and cut the top of the box
Mark smaller squares in the corners of the other pieces of cardboard that have the dimensions of (C – 1/4″). You can cut out a small piece of cardboard this size to trace around. These measurements will make the top of the box a little wider than the bottom, allowing the lid to fit on. Mark cut (solid) and score (dashed) lines as shown in the photos.
Trim and adjust
Try folding up the box and lid. If it’s difficult to fold, cut out a little on the sides of the flaps to make extra room for the folds.
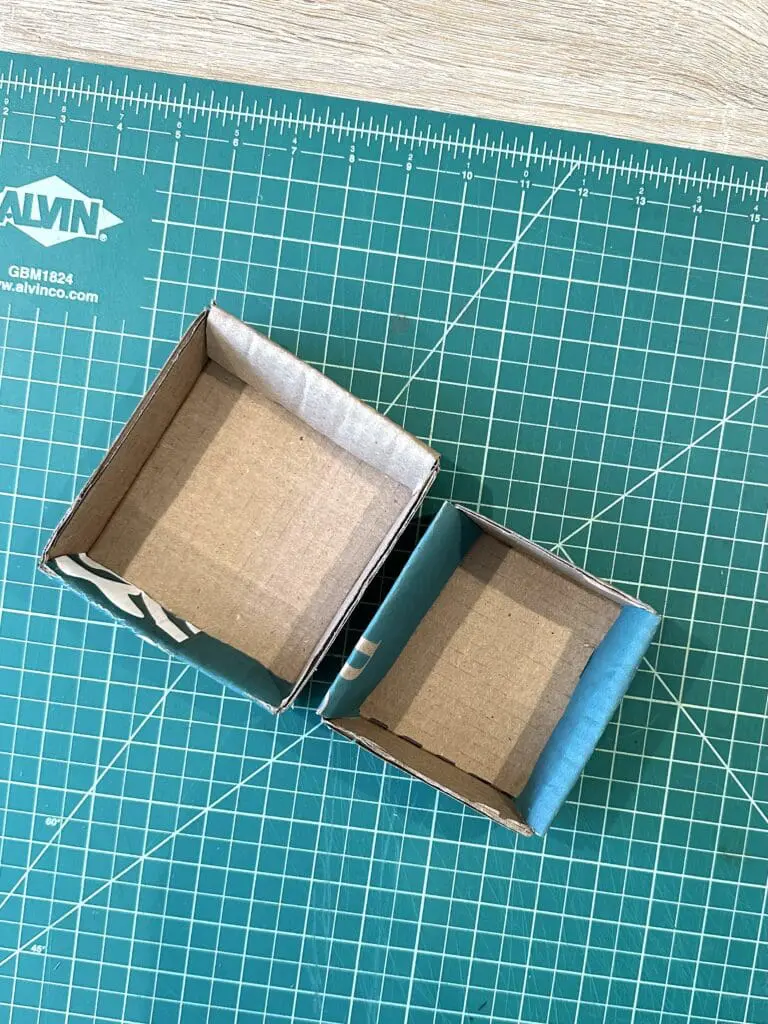
Fold the box and secure
On both top and bottom, glue (or staple) the small flaps on the front and back sides to the inside of the left and right sides, to keep the box together. For easier folding, fold with the scoring on the outside. Get a smoother look by folding with the scoring to the inside of the folds.
Use your new box

Alright! Put some stuff in that DIY box! Need some inspiration?
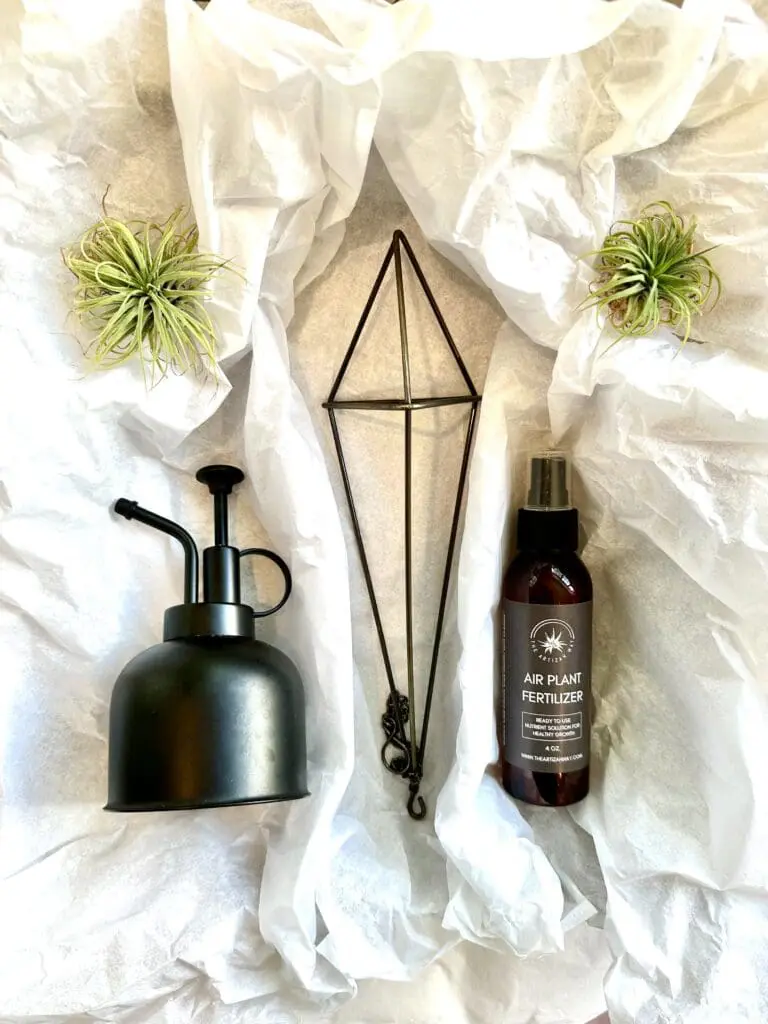
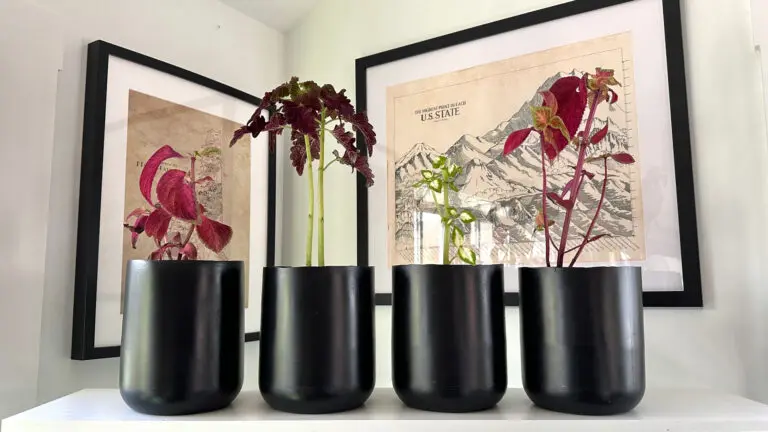
Ideas for an Air Plant Gift Box
Give the gift of beautiful, easy-to-care-for air plants!
In Conclusion
Now you have the tools to make a DIY cardboard box in any size you’d like. We hope you enjoyed our article and thanks for reading! Use #willenwoodgrove to show us your creations!